Rhubarb

Rhubarb

By Carla TePaske of Cameron, WI ~ The Little Garden That Could

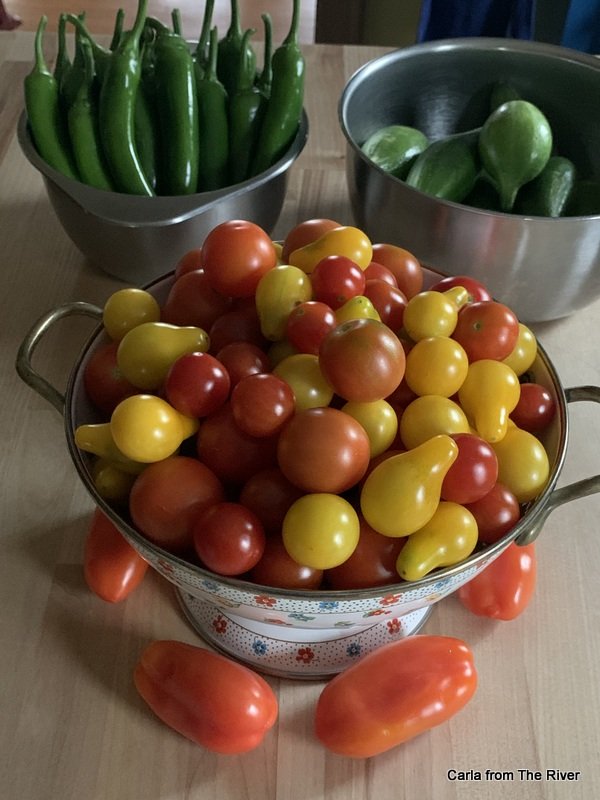
Rhubarb is an early bird surprise for us gardeners. It is cut and come again. We use it in sweet and savory dishes. Rhubarb is incredibly long lived. Once established, it grows happily in the same spot year after year.

Rhubarb is good for us. It is particularly high in vitamin C and fiber.

The best way to plant rhubarb is to plant rhubarb crowns. Rhubarb is greedy, work mulch into the soil and around the planting. Wait two or three years for the plant to get established before harvesting.

If you spot a towering flower plume, pick it, the plume may reduce your crop.

The best way to harvest rhubarb is to run your finger down the groove of the stem until you reach the root. Give a gentle tug and it will come off in your hands, leaving any buds forming just below your mature stem to develop into the next crop. For the plants sake, do not over pick, leave some of the stems. A general rule is pick ⅔ of the stems, leaving ⅓.

Until next time, happy gardening!

Cameron Chronicle ~ February Article ~ Sweet Peas

Hello Friends,

I am sharing the article I wrote for the February issue of the Cameron Chronicle.

Sweet Peas

By Carla TePaske of Cameron, WI ~ The Little Garden That Could


Sweet peas are the perfect flower if you are looking to add fragrance and romance to your garden.

Sweet peas have a hard seed coat. To aid germination you may find it helpful to leave the seeds in a small saucer of water for 24 hours before sowing.

Sweet peas do not like to have their roots messed with. An easy way to sow sweet peas early in the house is to use a rootrainer or a toilet paper roll. They are ideal as they provide a deep, narrow area for the root to run. If you choose to use the toilet paper roll, you can plant it right into the ground when you are ready to plant out your sweet peas.

When there are three or four pairs of leaves, pinch out the leaders – just squeeze off the growing tip between your finger and thumb. This promotes vigorous side shoot formation, with the energy of the plant directed toward growing out, not up.
Check your plants regularly and water them lightly if the surface begins to look dry. About a month from germination, check the bottom of the pot for white roots. 
When potting out make sure you plant your sweet peas alongside a vertical support such as a tee-pee, an arch or a tunnel. Plant 2 plants to each rod of a vertical support.

As the young sweet pea plants begin to grow, tie them into the frame – don’t leave them to flop around. They’ll grow more quickly and make stronger plants tied in regularly.

Feed and water your sweet peas. They are hungry plants and do not like to dry out.

You can let your flowers go to seed and collect the seed pods in the Autumn. Let the seeds dry out for a few months and store in a labeled envelope. The seeds that you collected may vary slightly from the parent, especially if you grew a mix of varieties. You will have created your very own unique sweet pea.

Until next time, happy gardening!


Do you still have your Poinsettia?

Hello Friends, do you still have your Christmas Poinsettia? Is it starting to look a bit shabby? Check out the article I wrote for our local village newspaper with tips and tricks with saving your Christmas Poinsettia.

Christmas Poinsettia

By Carla TePaske of Cameron WI ~ The Little Garden That Could


Struggling to keep it alive. Here are a few tips.

Poinsettia like a bright spot, but not direct sunlight.

Used to drought, poinsettia hate being over-watered so don’t leave them sitting in water, but instead let the soil dry out a little before watering again (usually every 3-4 days).

Writing for the Cameron Chronicle in 2024

Hello Friends, I am sharing the article I wrote for the January 2024 issue of the Cameron Chronicle. I will be writing for our local village newspaper again this year. I will post my articles here on The Buzz page.

Happy Gardening!

Roses

By Carla TePaske of Cameron, WI ~ The Little Garden That Could


Happy New Year to you all. As we jump into a new gardening year I plan to pick certain plants and flowers to discuss and give tips for success.

Roses are a favorite of mine, but lately I have been having pest and black spot problems. We will start talking pests. Rose aphids are the pest that I have been having the most trouble with. We garden organically. I will be sharing organic ways of managing pests. It may sound gross, but it works, use finger and thumb to squash aphid colonies on your plants. Encourage aphid predators in your garden, ladybugs, wasps and earwigs all like to eat aphids.

Black spot is the next problem I have with our roses. It is caused by a fungus, Diplocarpon rosae, which infects the leaves and greatly reduces plant vigor.


Underplanting with salvia has been proven to help the health of roses.

The sulphur in the salvia’s scent profile means that when they warm up, they release a natural fungicide. This helps keep the roses strong, healthy, mildew and black spot free.

Underplanting with salvias is a great organic gardening method, which allows you to forgo pesticides and chemicals. If you spot the signs of black spot, clear anyway any dead leaves which might work as a natural host for harmful spores.

I planted a salvia under one of my roses in late summer. I am in hopes it helps with black spot and other pests. I will keep you updated.

Until next time, happy gardening!

Forcing Amaryllis

Hello Friends, today I am sharing the article I wrote for our local newspaper, Cameron Chronicle.. the little paper with personality.

Forcing Amaryllis

By Carla TePaske of Cameron, WI ~ The Little Garden That Could


We soon will see amaryllis at the shops. Amaryllis have become favorites to force to bring some splash of color during our winter months. I will share a few tips when it comes to forcing amaryllis.


When it comes to strong and healthy plants, often the bigger the bulb, the better the plant becomes. Use free draining potting soil to pot up. The bulb should be poking out the top of the potting soil (a third or so showing). This will prevent the bulbs from rotting, which they are often prone to do in waterlogged soil. It is also a good idea to place a stake or twigs for support. These look excellent staked with birch branches in a pot or as a table centerpiece with fairy lights, dried leaves, and moss at the base.

Be careful not to over-water the bulbs, keeping this step to a minimum until leaves appear.


If you’re cutting amaryllis to use in arrangements, insert a thin bamboo cane or stick from the garden to ensure the stems stay upright. Simply place the stick up the hollow stem and secure with an elastic band at the end of the stem to stop it splitting and curling up like the tail of a pig.

Don’t toss the bulb after the season. When you’re sure that no more spikes will surface, you can begin deadheading the amaryllis. When the stems go yellow, you can then cut them down. During the remainder of the year, treat your amaryllis like any other house plant. In late August, early September your amaryllis will need a dormant season. Place in the dark until ready to kick-start the process again.

Until next time, happy gardening!


Hello Autumn

Hello Autumn

By Carla TePaske of Cameron, WI ~ The Little Garden That Could

Autumn is here and it is time to spruce up your entry using different items from the garden to create a perfect welcome to your home.

Squash, pumpkins and even those too big to eat zucchini can make a fun cornucopia at the front door. Bundle some tall grasses and purchase a mum. You just created a welcoming entry.

It is a good idea to clean your tools at the end of the season. Remove any caked on dirt. Scrub off rust with steel wool.

Remember to put your leaves to work. Leaves make a great mulch. They provide weed suppression and plenty of insulation as well as nutrients that will enrich the soil as they degrade.

Until next time, happy gardening!

It is Planting Season

Hello Friends, Today I am sharing the article I wrote for our Village newspaper, Cameron Chronicle.

Enjoy

It is Planting Season

By Carla TePaske of Cameron WI ~ The Little Garden That Could

It is planting season. That is right, it is time to plant garlic, spring bulbs and vegetables.

Garlic is easy and a lot of fun to plant.

There are two varieties of garlic, softneck garlic and hardneck garlic. You will want to plant hardneck garlic. Hardneck garlic is a good choice for very cold winters.

How to Plant Garlic

  1. Plan to plant garlic in Autumn about 4-6 weeks before the ground freezes.

  2. Garlic grows best in loose, well-drained soil.

  3. Just prior to planting, break up the garlic heads into individual cloves, leaving as much of the papery covering on each clove intact as possible.

  4. Plant cloves 3" to 4" deep, place them so the pointy ends face up.

  5. Water gently to settle the soil, and then cover the bed with a 4" to 6" layer of straw. Even as air temperatures drop, the soil will stay warm enough for the newly planted cloves to establish roots before the ground freezes. Sometimes you'll see some green shoots form in Autumn it is fine and won't harm the garlic. They'll begin growing very quick in Spring.

Spring Bulbs

Tulips, daffodils, allium and crocus are just a few spring bulbs to plant this month.

Microgreens

Do not forget to start your microgreens indoors on your windowsill. This is a fun way to garden and eat tasty greens during all seasons.

Until next time, happy gardening!

The Glut

Hello Friends,

The Glut is the most recent article I wrote for the Cameron Chronicle.

Happy Reading!

The Glut

By Carla TePaske of Cameron WI ~ The Little Garden That Could


It is that time, harvest time. Many times we can have a glut of a vegetable or herb and wonder, what more can I do with all this garden goodness.

This season I am making herb cubes. I am harvesting mint, lemon balm, lemon verbena and more and making herb cubes. It is easy. Pick and clean your herbs. Place three to five leaves in an ice tray, fill with water, freeze and enjoy. When frozen pop them out and store in quart freezer bags. Make sure to label your bags. Tip: I use silicone ice cube trays and they work great. I am making a few bags of herb cubes of each herb to have on hand in the winter months. You can add your herb cubes to water, tea or a mixed drink.

Tomatoes are easy to freeze. Harvest, wash and toss into a freezer bag. During the winter months bring out your tomatoes and use them in your chili and other soups.

Peppers are just as easy to freeze. I harvest, wash, and dice my green peppers and freeze them. In the winter months use your peppers for omelets, homemade pizza and soup.

Enjoy the season of the glut. I know I am going to be munching on as many cucumbers as I can.

Until next time, happy gardening!

When Dry Spells Become Drought

Hello Friends, today I will be sharing the article I wrote for the July issue of the Cameron Chronicle.

Enjoy

When Dry Spells Become Drought

By Carla TePaske of Cameron WI ~ The Little Garden That Could


Long periods of hot weather, without rainfall, remind us that water is a precious commodity. There are many things that gardeners can do to prepare for periods of drought, such as conserving water, mulching beds and borders, and choosing drought tolerant plants.

We will break down the three things that we can do to prepare for dry spells in the garden. Starting with conserving rain water, install a rain barrel kit. You can find these at Menards, Amazon, Home Depot and local hardware stores. You can also find Do It Yourself Kits online and on You Tube.

Mulching is an easy way to prepare for dry spells. Mulch is a thick layer of material placed over the soil and around the plants. Mulch helps suppress weeds and lock moisture into the soil while acting as a physical barrier to drying winds and direct sun.

There is a wide variety of mulches to use. Natural mulches include leaves, bark, and grass clippings. You can also purchase a mulch such as landscaping fabric, carpet squares or rubber mulch made from recycled tires.

Preparing for dry spells in the garden also means having plants that will cope well during the dry spell. One solution is to start planting more drought tolerant plants in our gardens. Drought tolerant plants usually native to dry regions such as the Mediterranean, have evolved to thrive in dry soils with little rainfall. When visiting your local Garden Center ask about drought tolerant plants.

Until next time, happy gardening!

Fill in the Gaps

Fill in the Gaps, my recent article I wrote for our village newspaper, Cameron Chronicle. Happy Reading!

Fill in the Gaps

By Carla TePaske of Cameron WI ~ The Little Garden That Could

The garden season is upon us. As we look out at our borders we may see some gaps. This is the perfect time to fill those gaps. Many Garden Centers are having sales. Using annuals like marigolds, zinnias and snapdragons are a perfect way to pop color in the areas that you need to fill in your borders.


Do not be afraid to try planting a few vegetables in those empty spots as well. Not only are you filling the gaps, you will be able to have fresh vegetables.


Remember to deadhead flowers as they go over, this will encourage more flowers all throughout summer.


Prepare for summer storms by staking your taller perennials and vegetables.


Until next time, happy gardening!